

Normally if a branch needs to be bent we reach for the wire and, providing our technique is good, we can position it just where we want it. However, sometimes the branch is too thick or for some other reason cannot be bent as we would like it.
One way to overcome this is to cut a narrow ‘V’ in the branch with a saw, then bend it so that the two faces of the cut come together allowing the cambium (the green layer below the bark) to fuse back together over time, thus fixing it in position.
This can be very successful if done properly but if you don’t pay attention to the details it can go badly wrong. You need to think it through carefully before you start. Ideally have couple of trial runs in your garden hedge or in some local woodland to give you confidence.
Some things you need to consider.
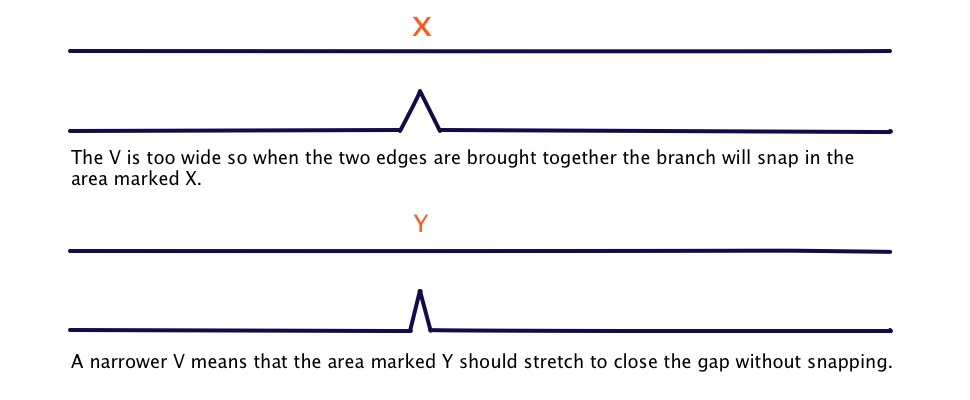
1) Don’t be over ambitious with the bend, the wider you make the ‘V’ the more chance you have of snapping the branch because the uncut side will have to stretch more to close the ‘V’.
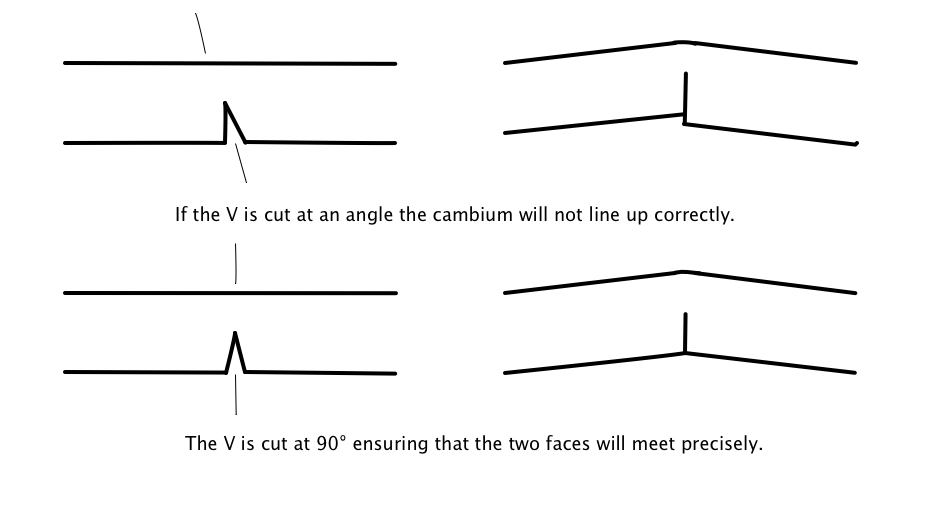
2) The two faces of exposed cambium need to meet exactly when the branch is bent so the ‘V’ needs to be cut at right angles to the branch.
3) Examine the area that will become the outside of the bend. It needs to be blemish free to ensure a straight grain beneath that will stretch more readily. Any buds, wire scars, old wounds, etc. will have produced irregular grain that will easily split when bent.
4) Think about the position you want the branch to finish up in and where to cut to achieve it. Any attempt to adjust it after you have made the cut will mean the cambium doesn’t line up or worse, the branch will snap.
5) How far along the branch do you need to make the cut/bend? If you want to change the angle of the entire branch then you need to work close to the trunk but depending what your aim is the bend could be further out.
6) How will you secure the branch in its new position? I prefer to use a guy wire attached to another branch, exposed root or some sort of scaffold attached to the tree. This will ensure firm contact. Winding wire around a half sawn through branch would be dangerous and even if successful the contact between the two areas of cambium might not be complete.
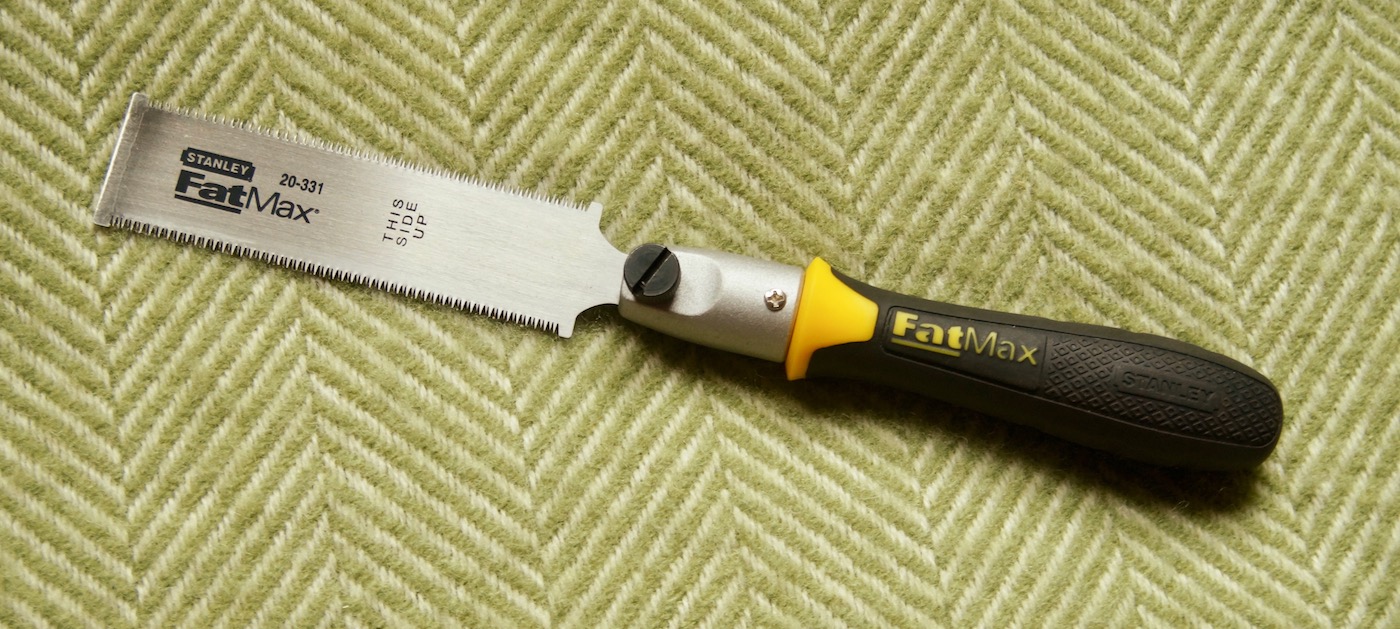
7) The kind of saw you use is quite important. You want minimum damage to the cambium so that it will heal well so a sharp, fine-tooth saw is best. I found online a Fat Max, Flush Cut, Pull Saw for less than £10 which is designed to make a very smooth cut on one side of the blade and is ideal for our purpose.
…
Having taken into account all of the above it only remains to make the cut. I normally do this May – July so that the branch is growing strongly and has time to heal before the dormant season.
1) Prepare the guy wire attachment.
2) Make the V cut with ‘the details’ in mind. Cut halfway through the branch.
3) Very gently bend the branch into its new position with the V completely closed so that the inside faces of the cut are in firm contact. Check for cracks on the outside of the bend, – oops, the V was too wide! This is not ideal but is not necessarily a disaster. Often there is still an attachment of bark and cambium at each end of the crack and if you proceed carefully it may repair itself.
4) Attach the guy wire. Be sure that the branch is held firmly in position.
5) Apply sealant to the cut and any cracks or stretch marks.
6) If the branch has cracked reduce the foliage as much as you feel comfortable with to cut down demand on the remaining healthy tissue and allow it to repair at its own pace. The more foliage you remove, the more likely you will be to save the branch.
7) No matter how successful you have been, leave the guy wire on for at least a year. That’s how long it takes for the cambium to grow a new annual ring to hold everything in place. It’s worth remembering that the wood you have sawn through beneath the cambium will not repair itself, only the cambium can re-fuse, so 2 – 3 new annual rings will need to grow to bring the branch back to full strength.
…
N.B. If you are only looking for a slight bend, for instance to put a little movement into a straight section, a single sawcut, using the thickness of the saw cut (the kerf) rather than a ‘V’, can sometimes be enough.
Tip. Let the saw do the work! This applies to any sawcut in any material. You only need to slide the saw back and forth so that the teeth can do their work, don’t force it. This approach will always result in a neater job.
…